DESCRIPTION
While using the File Upload flow screen input component, you must have noticed that it requires the related record id. So you can not upload files on the same screen from where you get the record information from the end user. That’s why you first create a record after getting record info from the first screen and then on the second screen you use the file upload component to upload files related to the records you created in the last step.
SOLUTION
So I am going to show you a hack using which you can upload files from the same screen from where you get the record information. Here are the steps
- Upload the file to $User.Id instead of record Id.
- Store the uploaded file Ids in a text collection variable (Content Document Ids)
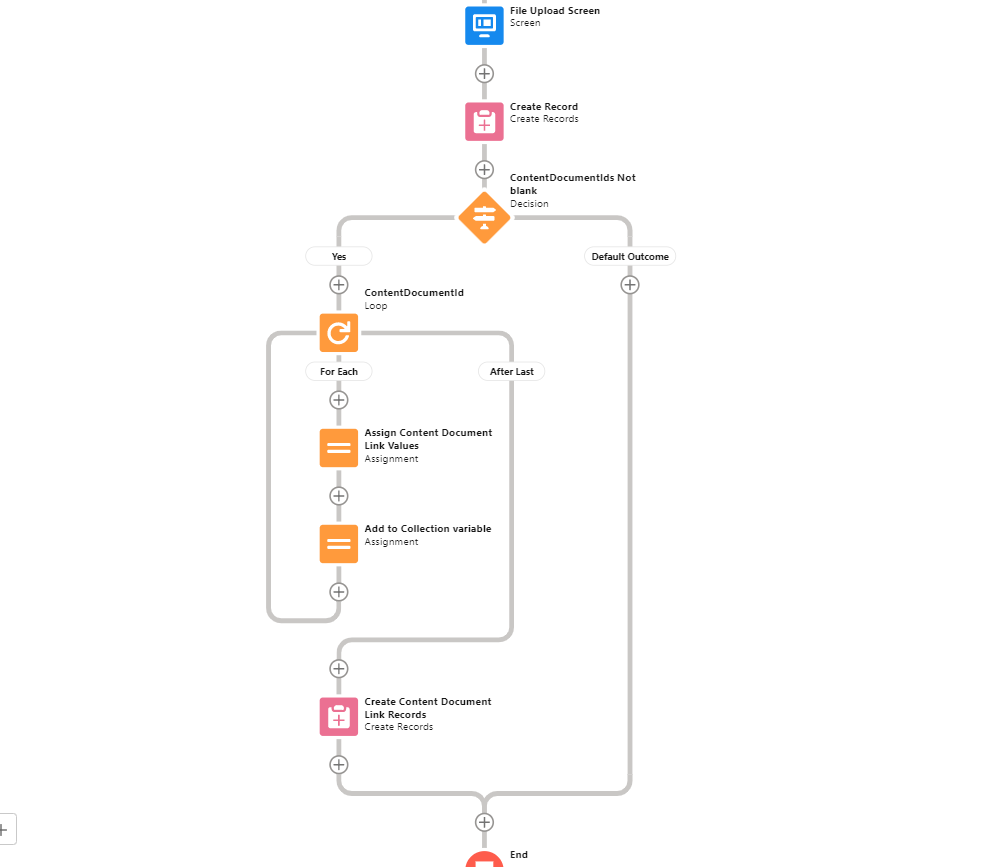
- Then after creating the record, loop over the collection variable and create a ContentDocumentLink record for each file, so that the file is linked to the new record.
STEP-BY-STEP GUIDE
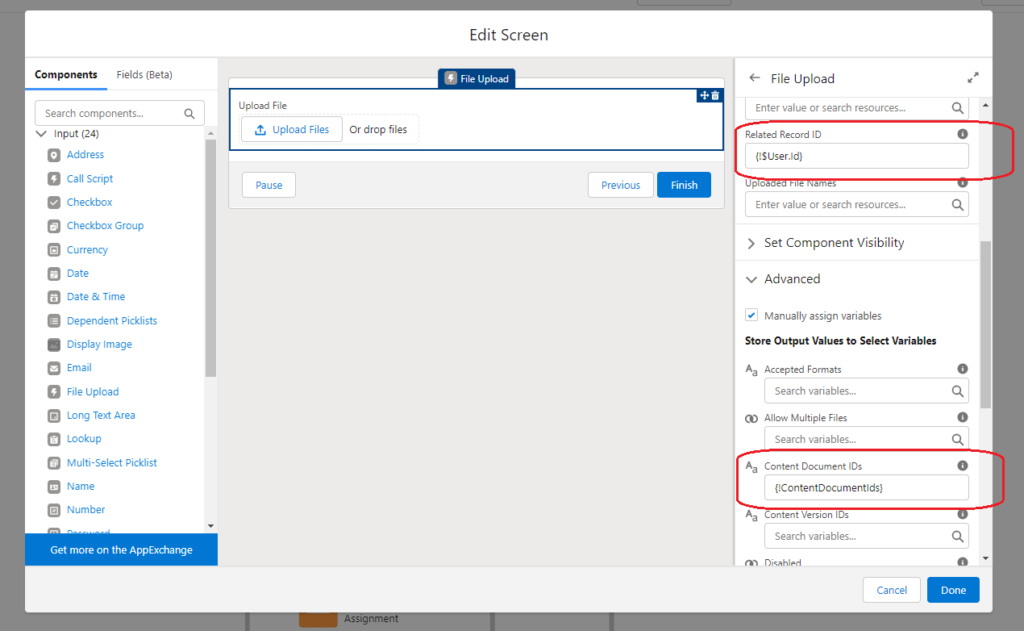
- On the file upload component, set the related record id as {$User.Id}, so the files are uploaded to the current user record.
- Then create a new text collection variable and name it ContentDocumentIds. Then in the advanced setting of the file upload component, check the manually assign variables checkbox.
- Then set the ContentDocumentIds variable in the content document Ids output field.
- See the screenshot, this is how the file upload component should look
- Now create the following two variables to hold the information about ContentDocumentLink records.
- ContentDocumentLinkRecord
- Resource Type: Variable
- Data Type: Record
- Object: Content Document Link
- Leave rest as default
- ContentDocumentLinkRecordsList
- Resource Type: Variable
- Data Type: Record
- Object: Content Document Link
- Check the checkbox Allow multiple values (collection)
- ContentDocumentLinkRecord
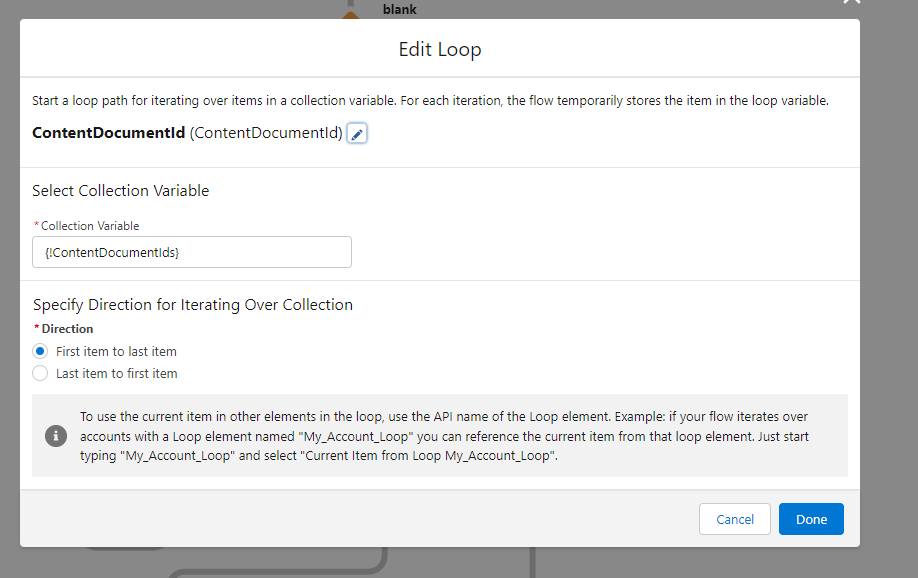
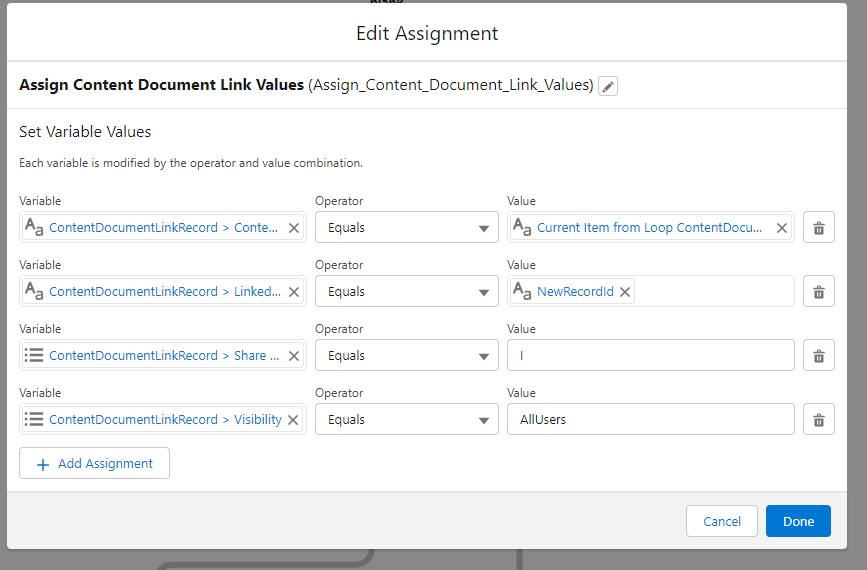
- Now loop over the collection variable ContentDocumentIds using the loop element. And inside the loop Assign values to the ContentDocumentLinkRecord variable. (See the attached screenshot).
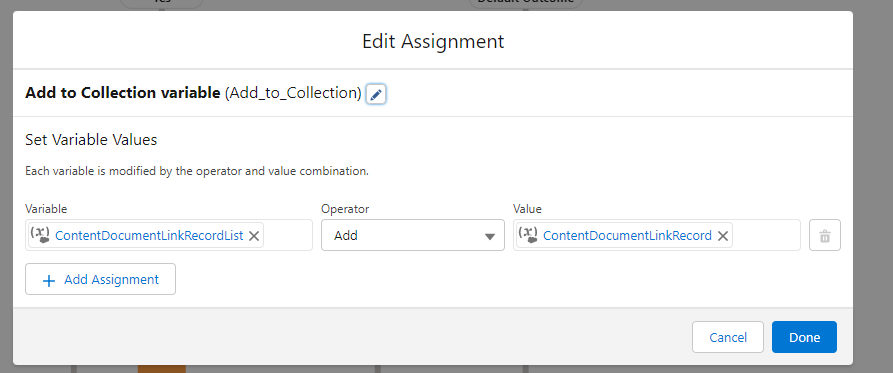
- After assigning the values to the ContentDocumentLinkRecord add the variable to another collection variable ContentDocumentLinkRecordsList. This is a best practice to don’t insert records inside the loop. So we are adding the records into a collection variable and then will create records when the loop ends.
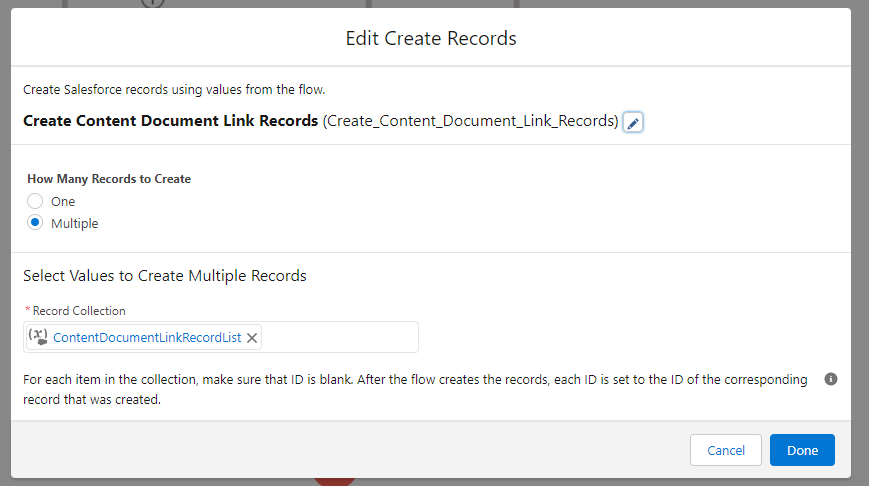
- After the loop ends insert the ContentDocumentLinkRecordsList using the Create Record element.
Boom! You are done. So now you can upload files from the same screen. You can create it as an auto-launched flow, that takes recordId and ContentDocumentIDs as input parameters and then can use it as a sub-flow from any screen flow.
This is how the flow should look at the end.
